Usage
Standard Bootstrap based theme for Invenio.
Invenio-Theme mainly consits of:
- Templates and static files - for integration with Bootstrap HTML, CSS and JS framework.
- Error handlers - for showing user-friendly 401, 402, 404, and 500 error pages.
- Menu and breadcrumbs - for basic site navigation using Flask-Menu and Flask-Breadcrumbs.
Initialization
First create a Flask application and initialize
InvenioTheme extension.
>>> from flask import Flask, render_template_string
>>> from invenio_theme import InvenioTheme
>>> from flask_menu import register_menu
>>> app = Flask('myapp')
>>> theme = InvenioTheme(app)
Note
There is a new blueprint registered during initialization in order to enable loading of templates and static files from Invenio-Theme. The blueprint does not have any views registered.
In order for the following examples to work, you also need to load the Invenio-I18N and Invenio-Assets:
>>> from invenio_i18n import InvenioI18N
>>> from invenio_assets import InvenioAssets
>>> i18n = InvenioI18N(app)
>>> assets = InvenioAssets(app)
Basic customizations
Invenio-Theme makes it easy to perform some simple customizations such as changing logo.
Logo and name
The easiest customization you can do is changing the logo and name of your
Invenio instance. Simply set the invenio_theme.config.THEME_LOGO and
invenio_theme.config.THEME_SITENAME configuration variables:
>>> app.config.update({
... 'THEME_LOGO': 'images/invenio-black.svg',
... 'THEME_SITENAME': 'Awesome Site',
... })
The logo path is relative to your static folders. Also, if you don’t want a
logo displayed, you can simply set the value to None.
Search bar
If you don’t like having the search bar available in the header, you can
modify the behaviour by setting
invenio_theme.config.THEME_SEARCHBAR to False:
>>> app.config.update({
... 'THEME_SEARCHBAR': False,
... })
Analytics tracking code
If you need to include an analyics tracking code in your HTML pages (e.g. to
track analytics with Piwik or Google Analytics) you should set the
invenio_theme.config.THEME_JAVASCRIPT_TEMPLATE variable to a template
which includes the tracking code:
>>> app.config.update({
... 'THEME_JAVASCRIPT_TEMPLATE': 'invenio_theme/trackingcode.html',
... })
Note that invenio_theme/trackingcode.html is empty so you have to provide
your own template with the tracking code.
Google Site Verification
Google Webmasters Tools allows you to
inspect how Google is indexing your site. In order to see your site, you must
provide proof of ownership which is done by e.g. including a token generated
by Google in the meta-tags of your website. You can easily do this with
Invenio-Theme theme. Simply update the
invenio_theme.config.THEME_GOOGLE_SITE_VERIFICATION configuration
variable with the list of tokens provided by Google:
>>> app.config.update({
... 'THEME_GOOGLE_SITE_VERIFICATION': ['...token...'],
... })
Templates
Templates in Invenio-Theme falls in two categories:
- Page templates such as the base, cover and settings templates which defines a template for an entire page.
- Section templates such as the header and footer templates which is included as part of a page templates.
Most simple visual changes can be done by just overriding a section template. Larger visual changes will likely require changes to one or more of the page templates.
Overriding templates
Most of the time all you need is to customize a small part of an existing template. This is best achieved by extending the Invenio-Theme template and overriding the template block you would like to customize.
For instance, say you wanted to include two logo files instead of only one in
the header, then you could extend the header template and override the
brand block like this:
{# mytheme/header.html #}
{% extends "invenio_theme/header.html" %}
{% block brand %} ... {% endblock brand %}
In order to make Invenio use this new header template you must set it in the
configuration (assuming the template was saved in a template folder under
mytheme/header.html):
>>> app.config.update({
... 'THEME_HEADER_TEMPLATE': 'mytheme/header.html',
... })
Warning
In general, if you override a template you should provide the same template blocks as the template you override. This is because other Invenio modules may rely on these template blocks,
Header section template
The header template (invenio_theme/header.html) is reponsible for rendering
the navigation bar (including logo, search bar, menu and login/sign up
buttons), flash messages and the breadcrumbs.
Change the template by updating
invenio_theme.config.THEME_HEADER_TEMPLATE.
The template provide a number of blocks which can be overridden. The most important ones are (please see the template file for full details):
navbar- Displays the navigation bar and inlcude other template blocks such asnavbar_header,navbar_navandnavbar_right.flashmessages- Displays small notification messages such as “Successfully logged in.”breadcrumbs- Displays the breadcrumbs.
Header login section template
The header login template (invenio_theme/header_login.html) is responsible
for rendering the login/sign up buttons as well as a user menu if a user is
logged in. It is included by the header template and does not define any
template blocks.
Change the template by updating
invenio_theme.config.THEME_HEADER_LOGIN_TEMPLATE
Javascript section template
If all you need to customize is to load some additional JavaScript, you can
just override the JavaScript template (invenio_theme/javascript.html). This
template is responsible for including site-wide JavaScript modules.
Change the template by updating
invenio_theme.config.THEME_JAVASCRIPT_TEMPLATE
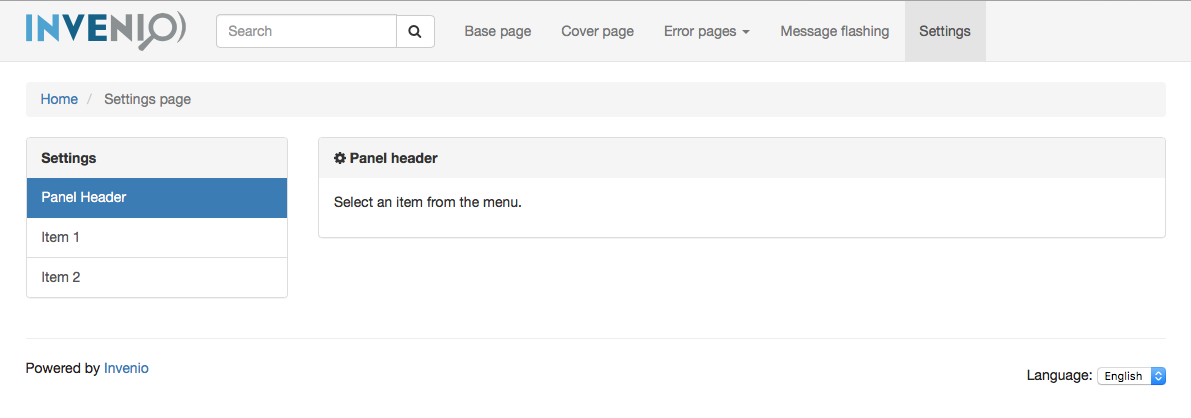
Settings page template
The settings template (invenio_theme/page_settings.html) is responsible for
rendering user settings pages such as the change password dialog.
Change the template by updating
invenio_theme.config.SETTINGS_TEMPLATE
The template provide a number of blocks which can be overridden. The most important ones are (please see the template file for full details):
settings_menu- Renders the left-hand menu and include another template blocksettings_menu_itemwhich renders an individual menu item.settings_content- Renders the right-hand content panel and include three template blocks forsettings_content_title,settings_bodyandsettings_form.
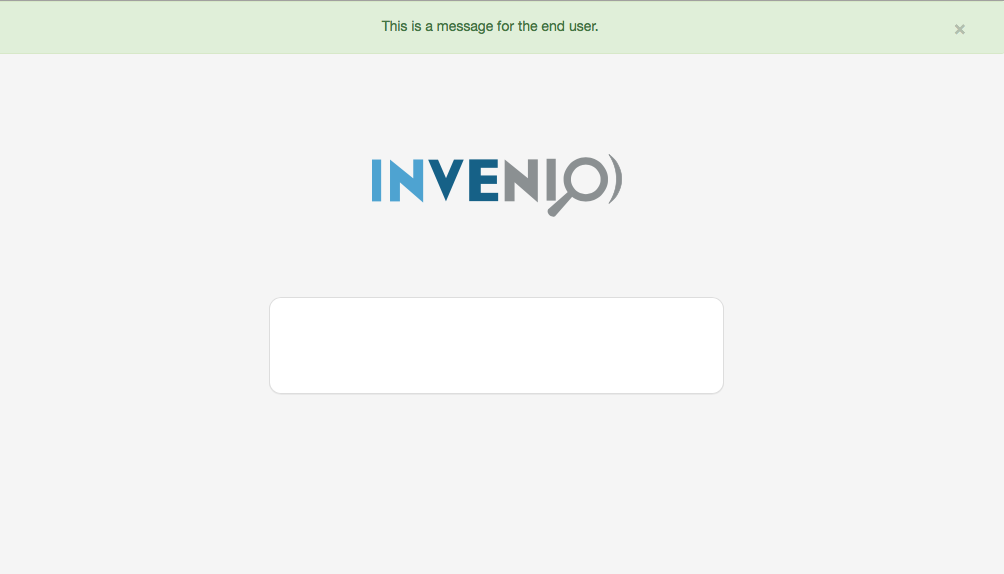
Cover page template
The cover template (invenio_theme/page_cover.html) has a simplified layout
and is used for e.g. displaying the login dialog and sign-up page.
Change the template by updating
invenio_theme.config.COVER_TEMPLATE
The template provide a number of blocks which can be overridden. The most important ones are (please see the template file for full details):
page_header- Includes e.g. the logo and branding.page_body- Renders the page body which includes a panel. The panel can be customized via the template blockspanelandpanel_contentand by setting the template variablepanel_title.page_footer- Displayed right after the page body.
Base page template
The base template (invenio_theme/page.html) is responsible for providing a
basic page skeleton with template blocks that can be overriden by templates
extending the base template.
Warning
If you override this template it is very important that you provide the same template blocks as Invenio is relying on the template block API provided in this template.
Change the template by updating
invenio_theme.config.BASE_TEMPLATE
The template provide a number of blocks which can be overridden. The most important ones are (please see the template file for full details):
header- Empty block you can override to add extra content in the head-tag.css- Block containing the link to stylesheets. By default just the Invenio-Theme CSS is included. Placed in the head-tag.javascript- Block containg the JavaScript tags. By default just Invenio-Theme JS is included. Placed in the very end of the page.page_header- Block which includes the header section template.page_body- Block containing the page content. Normally when using the template, this is the only block you need to override.page_footer- Block which includes the footer section template.
When using the template, a couple of template variables can be set t
title- Sets the header title-tag.description- Sets the description meta-tag.keywords- Sets the keywords meta-tag.
Error page templates
The error template (invenio_theme/page_error.html) is used as basis for
error pages such as unauthorized access, internal server error etc.
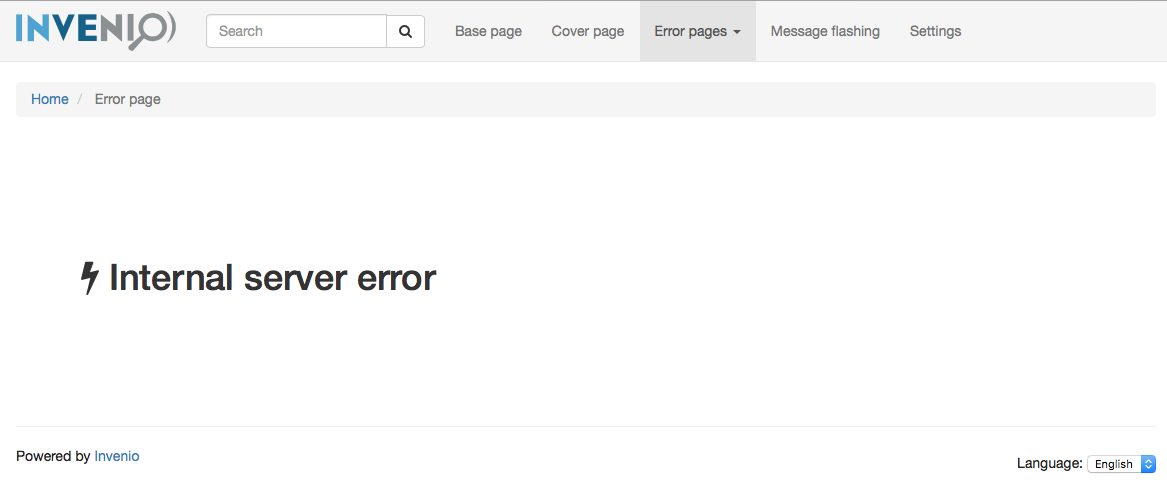
Change the template by updating
invenio_theme.config.THEME_ERROR_TEMPLATE. If you wish to just override
individual error pages you can set the variables:
Front page
The front page (invenio_theme/frontpage.html) is the homepage of the
application. By default is disabled.
Enable the front page view by setting THEME_FRONTPAGE to True
invenio_theme.config.THEME_FRONTPAGE
Change the template by updating:
invenio_theme.config.THEME_FRONTPAGE_TEMPLATE
The template provide a number of blocks which can be overridden. The most important ones are (please see the template file for full details):
page_header- Includes e.g. the logo and branding.page_body- Renders the page body which includes a panel. The panel can be customized via the template blockspanelandpanel_contentand by setting the template variablepanel_title.
Developing Invenio modules
Note
This section is only relevant if you develop Invenio modules that need to be able to change style depending on the currently installed theme.
This section describes a set of patterns for Invenio modules that allows the module to be themeable without hard depdencies on Invenio-Theme, which is important as otherwise users of your module cannot change the default styling.
Base template pattern
The base template pattern allows your module to extend from the currently installed theme’s base template.
First, create a dummy base template in your module. The dummy base template
should define the same blocks as you plan to use from the Invenio-Theme
template. In most cases this means just providing the page_body block:
{# invenio_foo/base.html #}
<html><body>
{% block page_body %}{% endbxlock %}
</body></html>
Note
Template paths need to be globally unique, so normally you should put your
templates in a subfolder named according to your module. For instance if
you are developing Invenio-Foo, then put your base template in
invenio_foo/base.html.
Templates you develop in your module should extend from config variable instead of directly from the base template:
{# invenio_foo/myview.html #}
{% extends config.FOO_BASE_TEMPLATE %}
{% block page_body %} ... {% endblock %}
The configuration variable you then set during your Flask extension initialization, according to this pattern:
# invenio_foo/config.py
FOO_BASE_TEMPLATE = 'invenio_foo/base.html'
# invenio_foo/ext.py
from . import config

class InvenioFoo(object):
    # ...
    def init_config(app):
        # Set FOO_BASE_TEMPLATE to the theme's
        # base template if theme is installed
        app.config.setdefault(
            'FOO_BASE_TEMPLATE',
            app.config.get('BASE_TEMPLATE'),
        )
        # If no theme is installed, this will set
        # the base template to the module's
        # base template.
        for k in dir(config):
            if k.startswith('FOO_'):
                app.config.setdefault(
                    k,
                    getattr(config, k))
Template rendering pattern
In views where you render a template you should normally let the template path be defined by a configuration variable. Otherwise it is not possible for an instance to override the template.
>>> from flask import current_app, render_template
>>> app.config.update({
...     'FOO_MYVIEW_TEMPLATE': 'invenio_foo/myview.html'
... })
>>> @app.route('/myview')
... def myview():
...     return render_template(
...         current_app.config['FOO_MYVIEW_TEMPLATE']
...     )
Alternatively if only some parts of a template should be customizable you can apply the configration variable pattern to the include:
{% extends config.FOO_BASE_TEMPLATE %}
{% block page_body %}
{# ... #}
{%- include config.FOO_MYVIEW_TEMPLATE %}
{% endblock%}
Breadcrumbs
Breadcrumbs works similar to menus, just use the
register_breadcrumb() instead.
>>> from flask_breadcrumbs import register_breadcrumb
Using this decorator, you can specify the position of the view in a
hierarchical manner, as well as the title in the breadcrumb. By default, the
current breadcrumb is displayed inside the page_header block in the base
template.
>>> @app.route('/part1')
... @register_breadcrumb(app, '.', 'Index')
... def part1():
...     return ""
>>> @app.route('/part2')
... @register_breadcrumb(app, '.p2', 'Part 2')
... def part2():
...     return ""
>>> @app.route('/part3')
... @register_breadcrumb(app, '.p2.p3', 'Part 3')
... def part3():
...     return ""
To learn more about the usage of breadcrumbs, see flask_breadcrumbs.
User settings
If your module allows your users to configure some settings, you can provide a setting view that is plugged into the settings menu.
First, create your template for your view:
{% extends config.FOO_SETTINGS_TEMPLATE %}
{% set panel_icon="fa fa-cog" %}
{% set panel_title="Panel header" %}
{% block settings_form %}
...
{% endblock settings_form %}
Next, when creating the view register the view n the settings menu:
@app.route('/settings/')
@register_breadcrumb(app, '.settings', 'Settings page')
@register_menu(app, 'settings.item1', 'Item 1', order=2)
def settings_item_1():
    return render_template('invenio_foo/foo_settings.html')
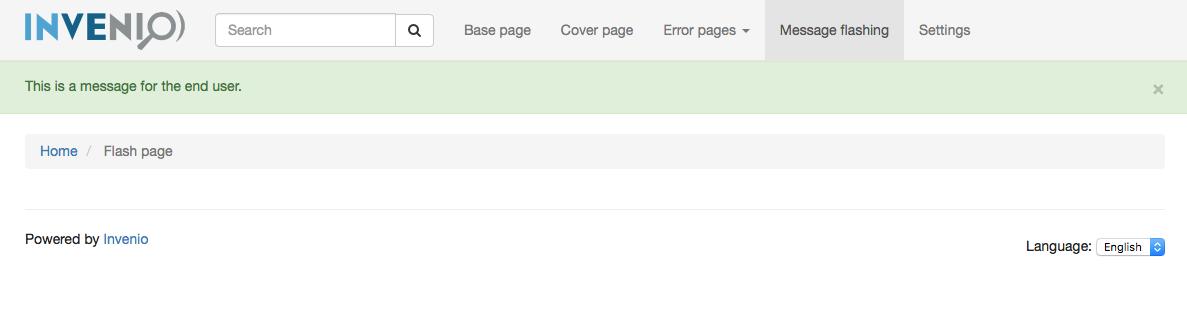
Message flashing
At any time during a request, you may choose to record a message for the
user in order to display it only once in the future. This is a great way for
providing feedback to the user after an action, and Flask provides the method
flask.flash() for this purpose. The first parameter is the message, while
you may optionally supply a second parameter that serves as a category that
gives context to your message.
Invenio-Theme provides a macro in invenio_theme/macros/messages.html called
flashed_messages that iterates through stored flash messages for the
current user and displays them in the current page. The category can be one of
‘info’, ‘danger’, ‘warning’ or ‘success’. Using one of these will attach the
appropriate Bootstrap class to the message. By default, the current flashed
messages will be displayed inside the page_header block in the base
template.
@app.route('/myview')
def settings_item_1():
    flash('Testing flashing', category='info')
    return render_template('...')
